¶ Introduction
These instructions cover making recordings of events using the Church sound desk and a Windows laptop computer equipped with “Audacity” software.
The computer/software combination described below is for a Windows laptop. A highly similar setup can be taken for a Mac-based device.
¶ Operation
Plug in the USB lead from the Soundcraft Desk (if not already plugged in). The desk should be powered up (along with the other equipment).
Open Audacity on the device you wish to use.
If you have NOT plugged in the lead yet, plug it in NOW before you open Audacity otherwise you will receive no audio input!
Check that the desk has been recognised by clicking on the Sound Input dropdown, and select “Master L/R Mix”. Also check that the Sound output dropdown box is set to “Speakers”.
If the drop-down box does not offer this option, close down Audacity, check that the desk software has been enabled (look for the icon in the running aps section of the bottom toolbar) and then try opening Audacity again.
Check that the laptop speakers are muted (keypad, top LH side, indicated by a red line through the loudspeaker symbol bottom right).
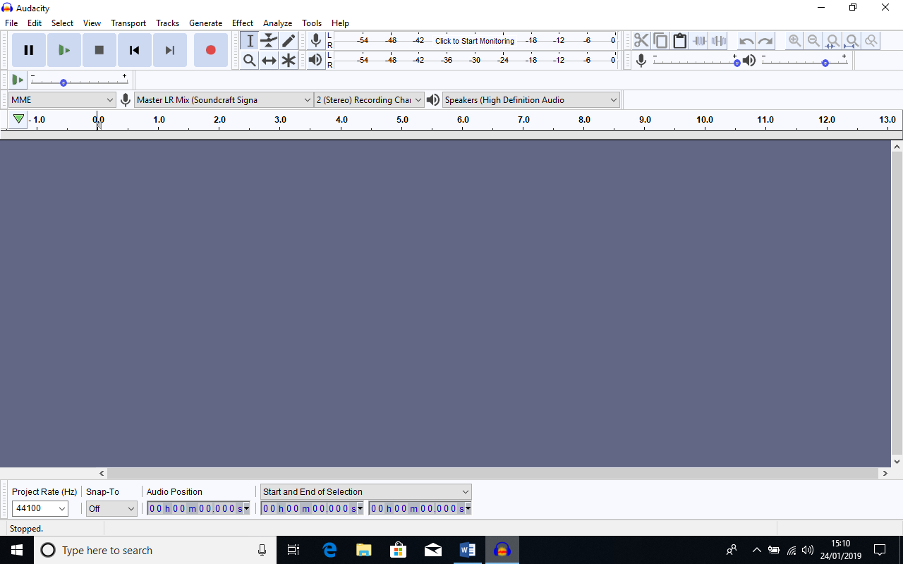
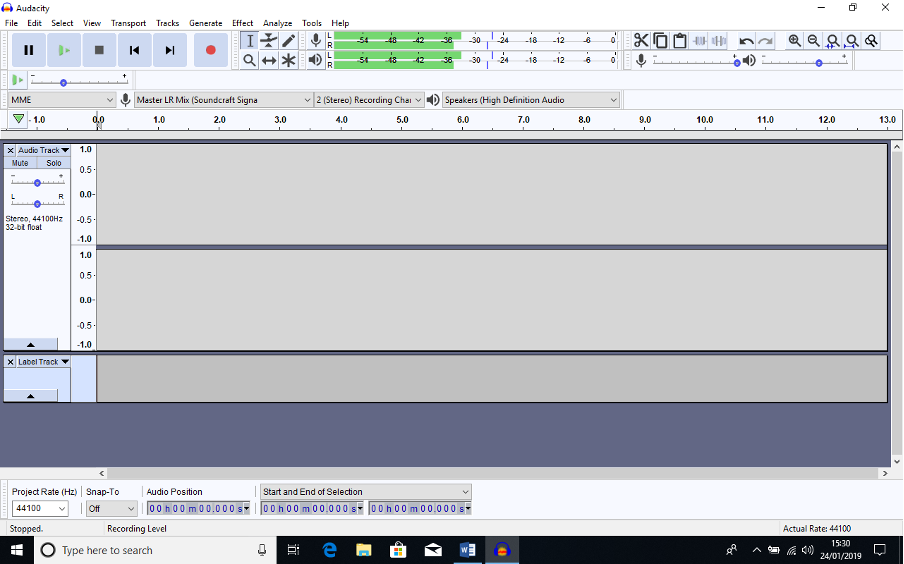
The software will open to show a screen (approximately – depends on update status) as below:-
If not already at maximum, adjust the input volume slider to maximum (by the mic symbol, top RH).
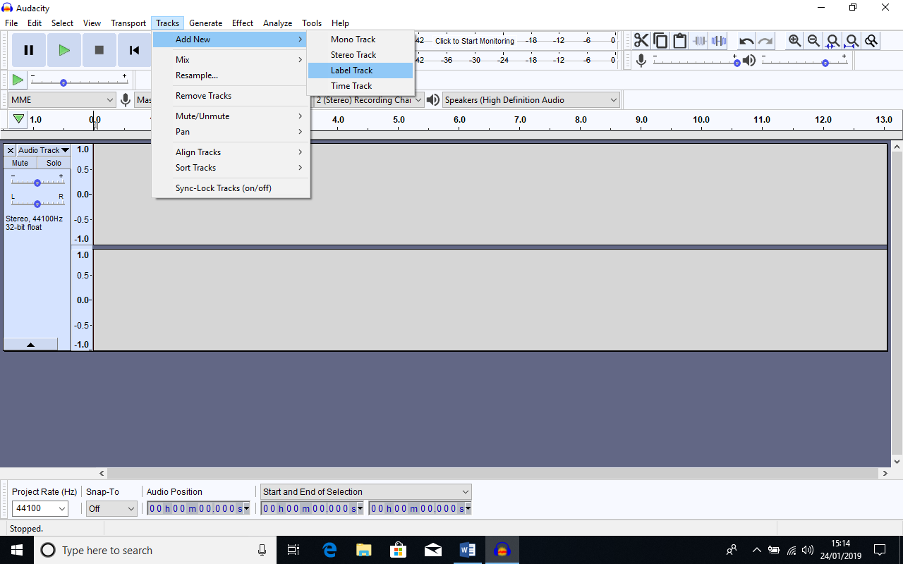
Go to the Audacity top menu and select “Tracks”. Move through the sub-menus to select “Add New” and “Stereo Track”, then again select “Tracks”, “Add New”, “Label Track” as shown below:-
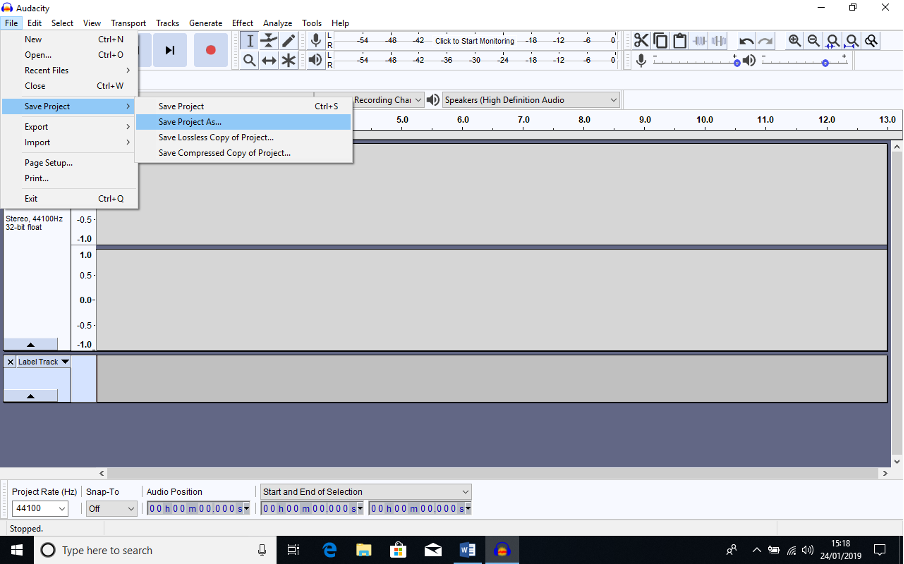
Now go to “File”, “Save Project”, “Save Project As” as seen below.
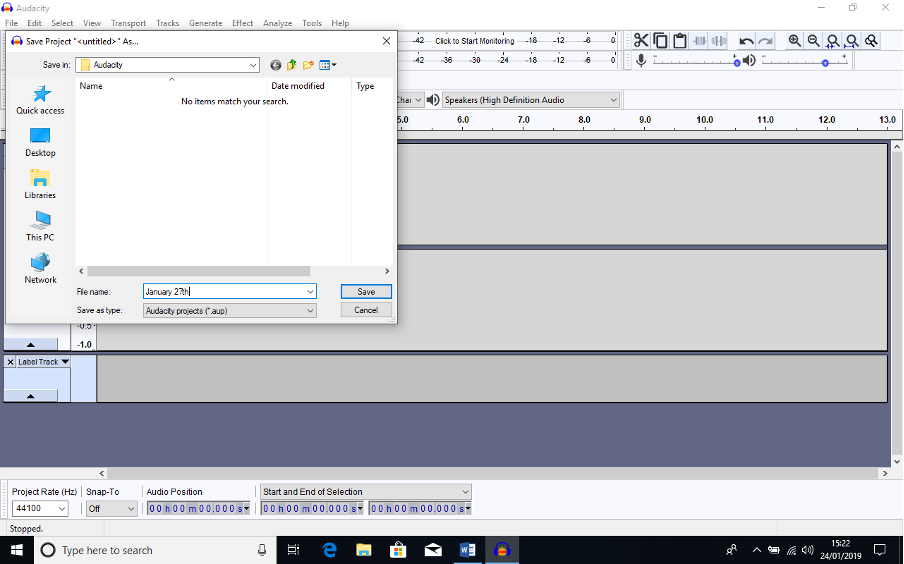
The “Save As” window should open onto the Audacity default folder (located in the hard drive “Documents” folder).
Choose and input an appropriate file name for the project. Please use a naming convention of Month Date (e.g. January 10th) as this makes retrieving files much easier!
You are now ready to start recording.
Set the master fader on the Soundcraft desk to maximum, then set the Recording Volume slider on the Audacity screen control to maximum (if not already there) and click on the input levels bar to start monitoring (see below):-
Now click on the Input Level meter (Top Middle, by the microphone symbol) where it says “Click to start monitoring”.
The meter should start showing input sounds (and output sounds on the meter below).
If all is well, and the congregation is chattering as normal, the recording level bars should be showing about -30dB to -40dB.
NOTE: it is advisable to check the sound feed to the laptop at this stage by plugging the headphones into the laptop headphone jack (RH side) and un-muting the signal. There should not be any audible hum or noise other than the sounds from the Church.
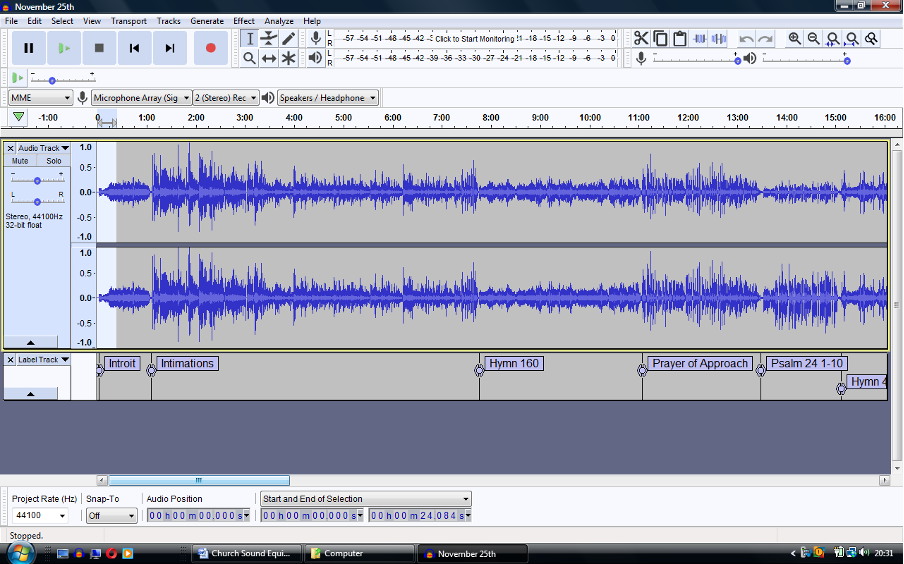
When ready to start recording, click the Red button and the stereo track will start to show recording as below:-
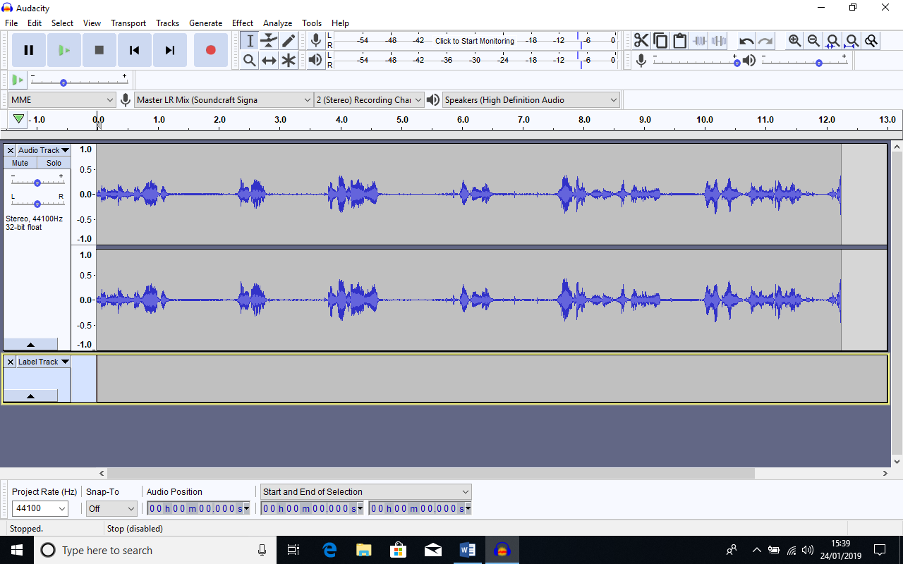
And that’s you recording!
¶ Recording Levels
As these recordings are generally intended for publishing on the Church website, where they will be listened to by persons with relatively poor playback equipment, and played in situations where background noise may be relatively high, we should be aiming to have all the important “content” (speech particularly but also singing) recorded at about the same level. This may mean that you have to make subtle adjustments to channel levels during the recording.
The setup on the Signature desk provides for entirely separate “mixes” for the P.A. system loudspeakers in the Sanctuary (Auxiliary 1), the Loop amplifier (Auxiliary 2), the Rear Hall speakers (Group 1/2), and the Recording feed (Master). The recording feed is thus entirely separate from the P.A. feed and can be run at much higher volumes without risk of feedback.
The gain controls for the 3 Aux channels have been set up to suit most normal situations, and should NOT require any adjustment.
Provided that the channel master gain controls (top, red) are NOT adjusted, the mix to the recording laptop can be controlled by use of the individual channel faders. Equalisation controls and the Pan controls will also be operational for the record feed. This means that the levels attainable from any of these channels can be well above what would otherwise have caused feedback, so it is perfectly possible to “crank up” the Lectern mic to capture a quiet speaker!
¶ Possible Problems
- Sound level too low – check connections. Check the desk output is OK using the headphones; if not, check the settings of the channel faders and Mute buttons, that the channels have been routed to Master, and the setting of the Master faders. You may have to go back to checking the Audacity input settings (see above).
- Hum and noise – this can occur at any time throughout recording and can usually be traced to the laptop power supply. You should first check the headphones from the desk – if you can hear it there you need to go through the desk channels (using the PFL button) to find out what is causing the problem and then isolate it. If you don’t hear it on the headphones from the desk but do hear it from the laptop headphone output then the problem is with the laptop and inter-connects. If you can’t eliminate it by adjustment of the power cable, then unplug the laptop power supply – it will usually run on battery for well over 1 hour.
¶ Adjustments during recording
- After a couple of minutes, press Ctrl-3. This will fit the recording into the screen width and slow down the display a bit! It can be repeated at any time to fit the recorded material into the screen width.
- Pay attention to the input level. It should not go continuously above -6dB (display will show yellow) and certainly not above -3dB. Use the desk Master fader to adjust as necessary. Note that very short periods above -3dB will not be a problem, particularly if caused by clapping.
- Use the Sound Desk to make adjustments to the relative levels of input channels e.g. to mute, increase, or decrease any of the channels.
- The Radio Mics can be muted OR UN-MUTED during recording e.g. if the Minister has forgotten to un-mute the signal. A small button on the top of the respective Receiver (shown with a loudspeaker symbol with a diagonal line through it) can be pressed, and will then mute or un-mute the signal. The receiver will show either a green light (active) or red light (muted). USE WITH CARE!
¶ Adding Labels
Labels are used to break up the finished recording into “tracks” when exported to either a WAV (CD) or MP3 (music players) format. For the purpose of lodging recordings on the Church website, a single MP3 file is required and labels are not necessary.
Labels can also be used during recording to set up markers for sections where editing may be required, e.g. where there is a long silent period (waiting for something to happen!), where there are extraneous noises (coughs, loud clapping etc.), or where the sound level is either too loud or too soft and will require adjustment during editing. If you are going to be doing the editing and uploading, this may help you later!
Labels can be added during recording or as post-recording editing.
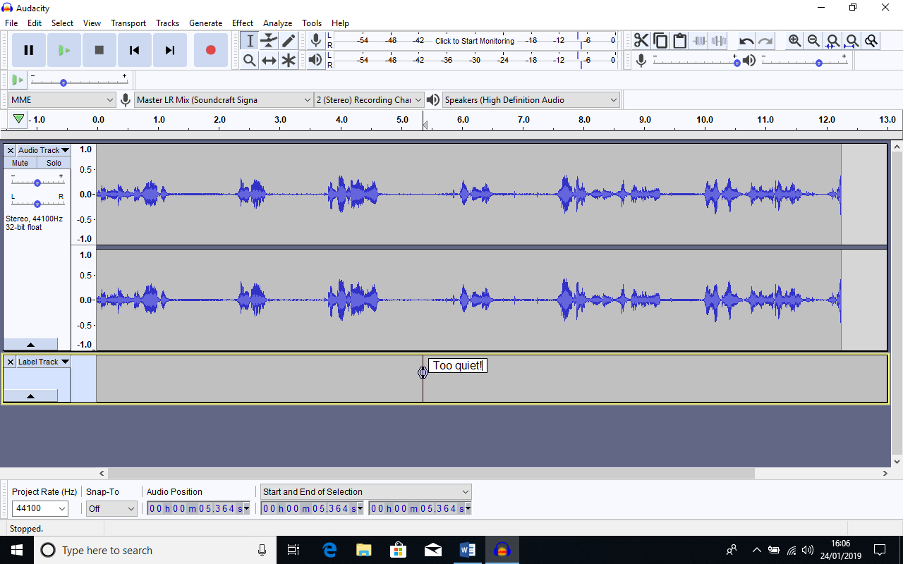
To add a label during recording, first highlight the label track (click on it). A yellow border should appear. Click on the track again where you want to place the label (this can be before or after the current recoding position).
Now use Ctrl-B to add a label, and then type whatever commentary is required. Click back onto the label track to finish text input (see below).
¶ Finishing the recording
At the end of the service, use the Sound Desk Master Fader to gradually “fade” the input, then press the “Stop” button. The recording will stop.
Note:- you don’t need to do a manual fade – this can be edited in later.
VITALLY IMPORTANT! Now save the Project by using the “File”, “Save Project” tab. This will clear almost instantaneously.
It is also advisable at this stage to COPY the Audacity file from its hard drive location to a portable drive (USB or SD Card).
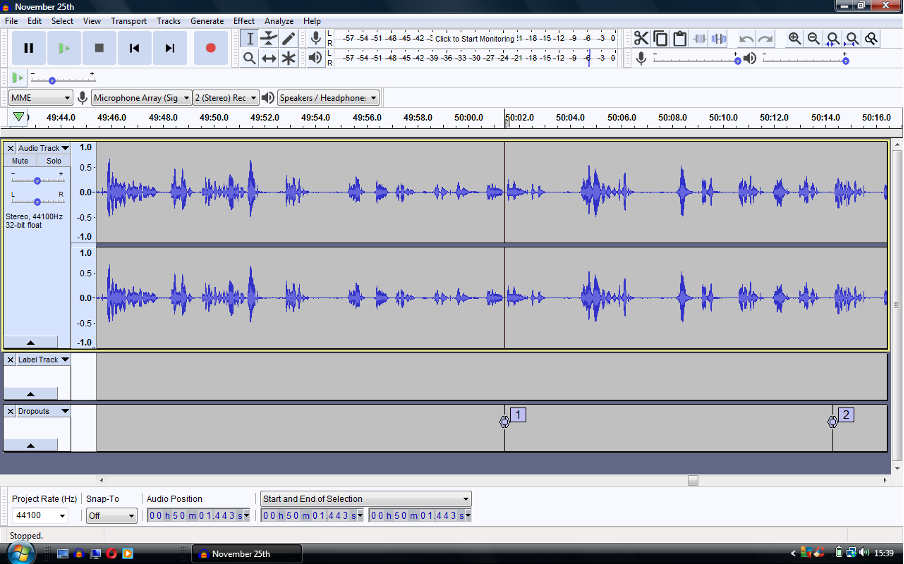
NOTE: During the recording an additional track may appear, labelled as “Droputs” – an example is shown below. This may happen when the software thinks that there has been a temporary loss of input signal. This may be triggered by a very quiet interlude. When saving the file, a warning popup screen will appear. As there’s nothing you can do about it simply accept the warning and Save the file as described above. The illustration below shows two dropouts.
You can now exit the Audacity program.
¶ Editing the Audacity file
Under normal circumstances, an audio-only version of the Church Service recording is compiled by using Audacity to extract an audio file from the composite MP4 Livestream/Recorded service.
The editing necessary for this will comprise only:-
- Removing extraneous material at the start of the service and at the end of the service (Cut and Fade In/Out);
- Judicious adjustment of audio levels where considered necessary; and/or
- Judicious removal of gaps or spikes.
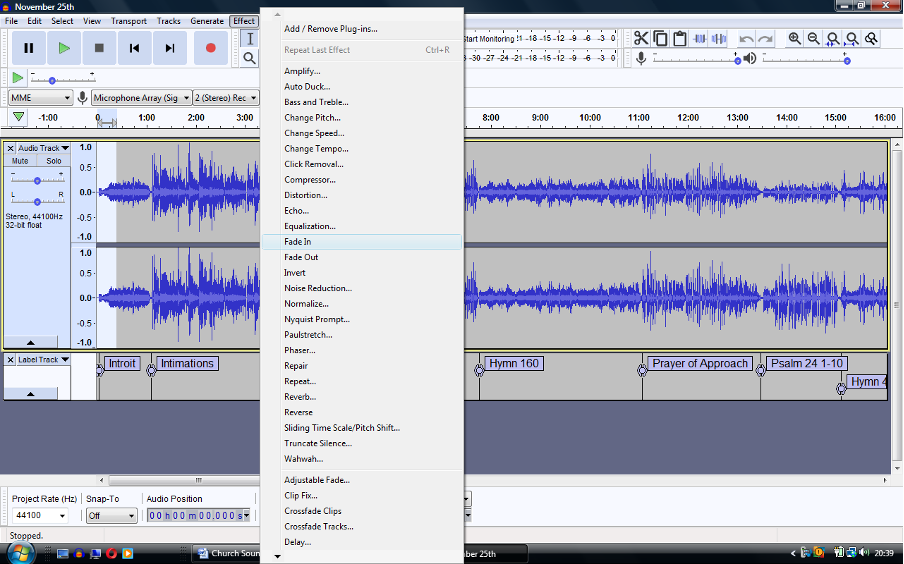
For other, more detailed recordings e.g. of Concerts, Audacity has a wealth of editing features, of which we will probably use only a limited few, such as “Fade In”, “Fade out”, “Cut”, and “Amplify”.
Open the Audacity File saved on the laptop (or copy a “saved” version on a USB or SD Card to a hard drive location on the laptop, and open that).
In most cases you may have to zoom in on the specific section of the recording you want to edit:-
Use the “Zoom in” or “Zoom out” buttons on the top RH task bar to increase or decrease the width of the window. Clicking on the Stereo Track window at your selected place and then clicking the “Play” button will let you hear the sound file (remember to un-mute the laptop!).
You can then select a section of the recording by dragging from the start of the selection either forwards or backwards – it will highlight as shown below. Clicking the “Play” button again will play only the selection, letting you confirm your selection.
¶ Fade in
If you hadn’t done a fade in at the beginning of the recording, you can now select the beginning (as shown above” then click on “Effect / Fade In” as shown:-
Once complete, you can replay the section.
You can “undo” any of the effects by using the “Undo” button on the upper RH task bar, provided you haven’t saved the file in-between.
¶ Fade out
This is done in the same way as the Fade In. Go to the end of the recording, select the section to be faded out, then use “Effect / Fade Out” as above.
¶ Cut
You can cut out sections where not much has happened, or even cut out an unwanted bit of sound such as a bang or cough. To take out the minimum amount of sound necessary, you will have to zoom In quite heavily and select as little of the recording as possible. Now use the “Scissor” tool to cut the section out, then check the modified file before Saving it.
¶ Amplify
The Amplify effect can be used to make a section of sound louder OR QUIETER, for example if a Bible Reader is too far away from the Lectern mic, the sound can be amplified, or if the radio mic is too loud the sound can be reduced.
Select the section of the file to be changed as above, then select the “Effect / Amplify” tool as below:-
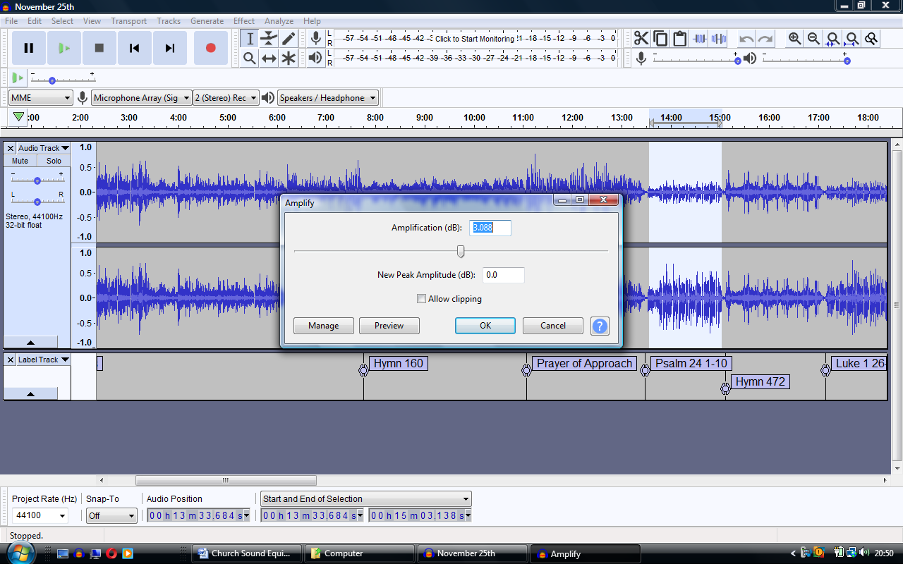
Audacity will suggest an Amplification level (in dB) and will show what the resultant level will be (New Peak Amplitude).
When making the selection, try to start and end at a period of (relative) silence, or the effect will be very noticeable.
This is a bit of trial and error. If the selection includes some “spikes” the suggested amplification may be quite low. You can cut out the spikes and try again, or you can simply press ahead and click the “Allow Clipping” check-box. The “Preview” button will let you hear the effect without making the change.
A +6dB change DOUBLES the volume; a -6dB change HALVES it. +20dB / -20dB equates to TEN times / one TENTH.
Try it and see what happens. You can always UNDO the change before Saving the file.
¶ Noise Reduction
If there are sections of the finished recording where noise (hum, hiss etc.) is too evident, this can be significantly reduced using the Noise Reduction Effect. This works by sampling a section of the unwanted sound, and then applying an anti-phase signal to the recording, which will cancel out the noise (a bit like noise-cancelling headphones). It can be applied just where the unwanted noise is evident or as a blanket correction across the whole file (this can take a while!).
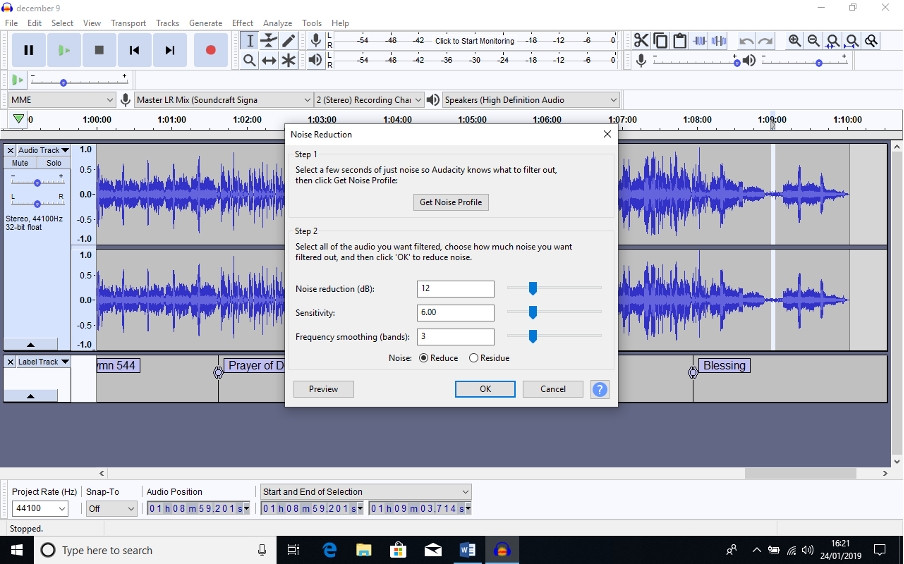
First select the small sample of noise, then click on the Noise Reduction effect:-
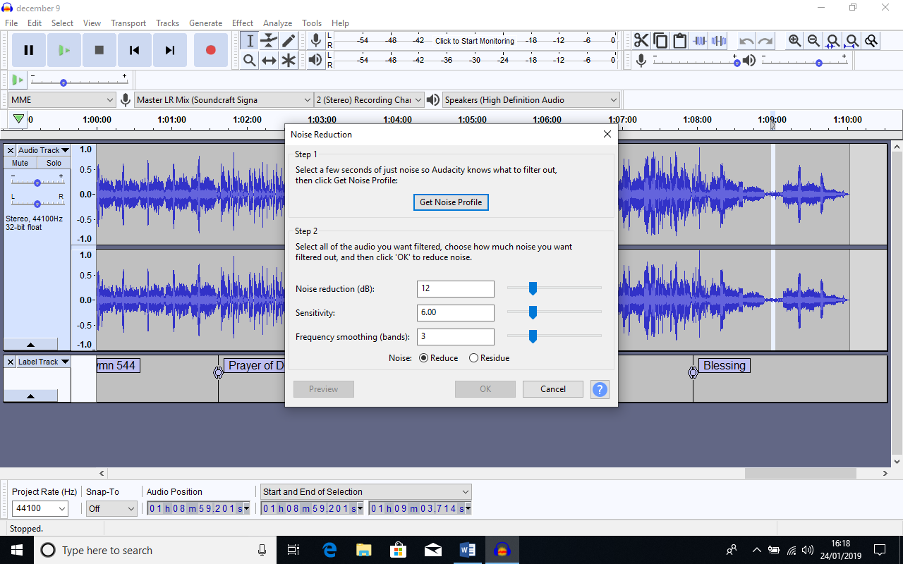
Click on the “Get Noise Profile”. The pop-up will disappear.
Now select the range of the recording you want to process, then go back into the Effects/Noise Reduction tab.
You can probably just accept the default values suggested for Noise Reduction, Sensitivity, and Frequency Smoothing. Try a “preview” if unsure; when happy, click OK.
¶ Creating an MP3 version
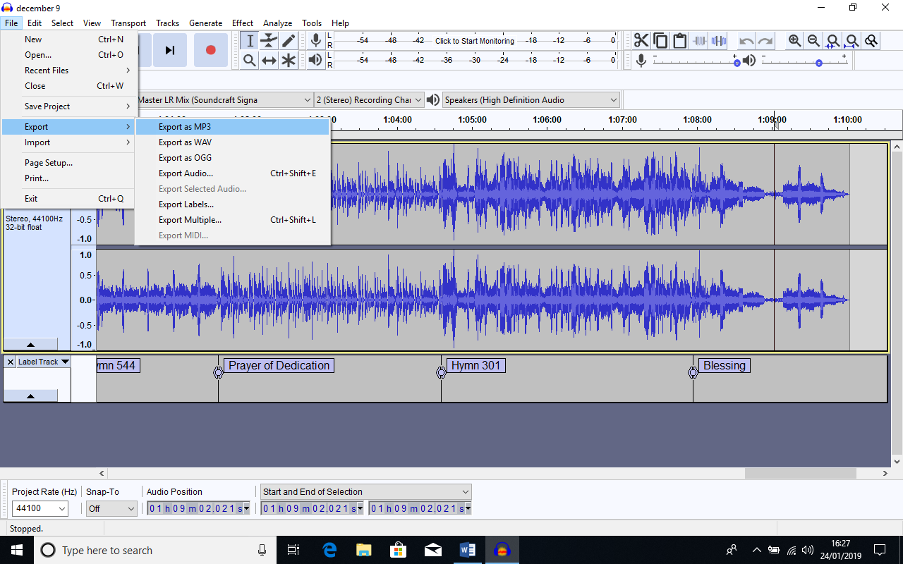
In Audacity, open the Project, and then select “File”, “Export” “Export as MP3”.
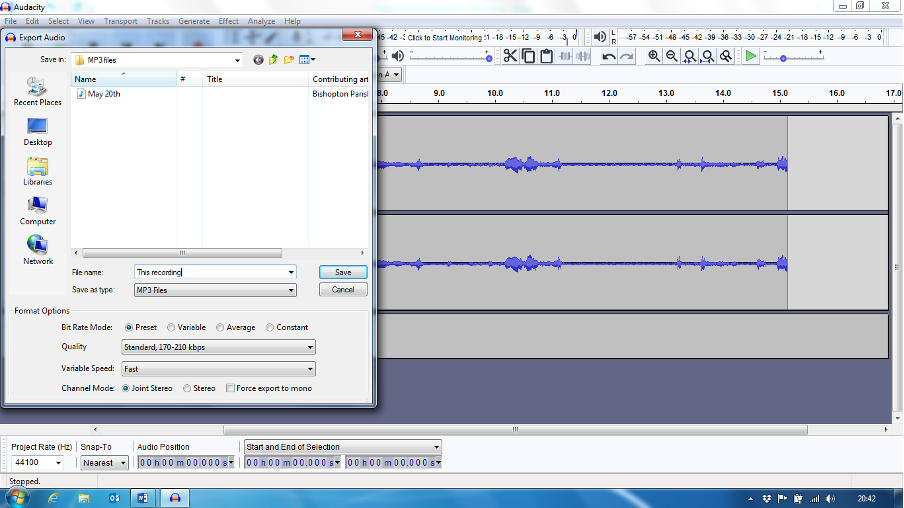
Click this and then Browse to the Google Drive of IT Committee\Audio Visual\Store\Service Store and save the MP3 track to the folder corresponding to the service. If this doesn't exist, check IT Committee\Audio Visual\Weekly clips .
Click “Save”. You will now need to add some “Metadata” as (roughly!) below:-
The “Track Title” should be a descriptor of the type of service e.g. “Communion”, “Normal Service”, and the “Album Title” should be the date of the service (date and month) with the “Year” being the current year. Track Number should be set as “1”.
Click “OK” and wait for the program to complete the save (may take 6-10 minutes).