¶ Background
This instruction covers compiling PowerPoint (Microsoft) presentations of the Order of Service (OOS) for a Sunday Service, including videos of Intimations, captions for camera scenes, words of Hymns (mostly from Church Hymnary Ed.4) plus any other required displays to produce a composite Powerpoint Presentation suitable for use within the Church on the audio/visual screens and for Live Streaming.
It also covers transcription of Hymn lyrics onto Powerpoint slides for inclusion within the composite Powerpoint Presentation (above).
Access to a PC (personal computer) running Windows 11 applications and with reasonably fast internet connectivity will be required. The PC must be set up with internet access, Microsoft “PowerPoint” app installed, and Google Drive (filestream for use on a PC) installed and accessing the Church Google Drive files. This in turn will require a Google account activated on the PC.
You will also need a copy of the Church Hymnary Ed 4 (CH4). Occasionally, Hymn lyrics will be called up from other Hymnaries (e.g. Mission Praise).
¶ Making up Hymn-word slides
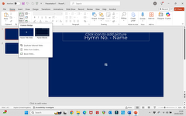
A PowerPoint template file has been made up for this “(IT-2025) Hymns template” at G:\Shared drives\IT Committee\Audio Visual\Store\PowerPoint Store. Double-clicking on this will open a new PowerPoint presentation file as shown:-
This shows the first slide of your new presentation, and is the Title and Caption Picture page of the Hymn words.
Click on the New Slide button (Home Menu) and you will see the two slide formats available – Hymn Title Slide and Hymn Words Slide.
Ideally, now go to the “File” menu (top LH), click on it and select “Save as”.
You’ll be asked to fill in the finished file name (this should be in the format hymn number – space – first line. You will also (at least the first time) have to select the destination folder for the file.
Select the “Browse” option, then look for “Google Drive” on the File Explorer window which will open.
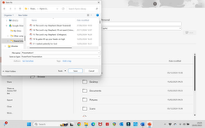
Navigate through the files until you get to “G:\Shared drives\IT Committee\Audio Visual\Store\PowerPoint Store\Hymn Library” Your screen should now look like below:-
Make sure you have the right file name and then click “Save”.
You can now go back to the PowerPoint window and continue to edit your file, remembering to occasionally click the “save” icon (little floppy disc!) on the menu bar.
Remember that PowerPoint has the undo/redo arrows on the menu bar so that if you make a mistake, you can go back – provided you haven’t saved the last change!
On the PowerPoint window, you have a basic presentation, with 2 slides open.
The first slide is for the Caption slide. You can import a picture (from anywhere on the PC, internet files, or on USB sticks or other removable discs) by clicking on the picture box and clicking the “Insert” option. You’ll need to navigate through the available files until you find one you think appropriate – you need to bear in mind Copyright issues.
Select the picture you want and then click “Insert”. The selected picture will be loaded into the text box.
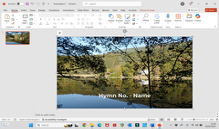
You can now go into the “Caption” box, to add the Hymn Number and first line.
You may have to move, resize and/or change fonts and colours to make the text visible!
That’s you first slide completed; click the “save” icon to save your work.
Now go back to the menu bar to work on your first “words” slide. 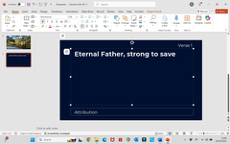
You can now start to add content to the first page.
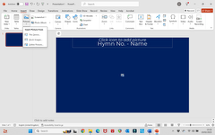
Click on the “Verse” text box and type in the Verse number.
Now click on the “Words” text box, and type in the first verse (or first 4 lines of the verse). The text box has been formatted to hold 4 lines of text of a “normal” hymn line length .
Results are as shown:-
Note that, in this case, the hymn actually has two more lines in Verse 1. This will require an extra slide.
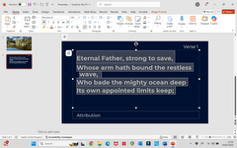
The background colour, size of font and line spacing have been selected to provide best visibility on the Church A/V screens.
To add an extra page, On the “Home” menu, click the small arrow on the side of the “New Slide” icon.
Click on the “Hymn Words” picture, and a blank (but formatted) Words slide will be added to your presentation. You can repeat this several times to add the required number of pages (or there are some slightly quicker ways of adding extra pages).
From here on in, simply keep adding pages (remembering to update the Verse Numbers as appropriate ).
For the last verse, for preference label it as “Last Verse” – it helps the singers and the AV Team!
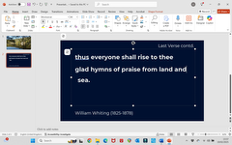
Finally, on the last slide, click into the “ATT” box and type in the attribution from the end of the Hymn words.
You should now have a full Hymn Words file. Make sure to “save” it!
Then go back over it to look for typos, etc.! Note that Powerpoint by default capitalises the first letter of a “new line” – you may have to change this manually.
Good luck!
¶ Making up a Service PowerPoint presentation
The new Powerpoint presentation is built up from the previous week’s PPT in the Weekly Clips folder. Duplicate the folder from the previous week and rename all files in the folder to the format of DDMMYYYY_FILEHERE, and the folder itself to the format of DD MONTH YEAR. The usual source for the content will be an Order of Service file sent by email from the Minister. You can work directly from this, but it helps (sometimes!) to run off a print and use that. This may include some slides for incorporation into the overall presentation – but probably not. Copy the OOS (usually a Word document) to the new folder you created. The file will (as at June 2025) contain some 40 to 70 plus slides, the first and last being an embedded movie showing the Intimations. Delete the slide contents (NOT the slides) of these 2 slides (so you don’t forget later …). The first few slides after the Intimations contain “information” slides – see example – which have a Text Box with a dark background over a dark blue general background.
These slides are used throughout the presentation to provide information for “Down Stream Keying” above the program picture, and are activated on the ATEM by enabling the KEY1 Downstream key.
When enabled, they will show on the current Program view as a Caption using the dark text box.
Slides such as these are included within the template, and you can add in any that are required via the New Slide function. There is also a few blank options if neccesary to create your own placeholder.
Hymn word files will need to be – firstly – deleted from the file, and then added to the new file in the appropriate place by copying and pasting from the Hymn Library. 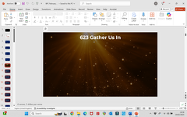
Deletion of unwanted slides is accomplished simply by highlighting the slides as shown and then simply pressing “delete”. You can use the “undo” feature if you’ve mucked up!
To add the new file, open (from File Explorer) the new PPT Hymn file, select all slides and use the “copy” function , then go back into the main file.  Select the slide just before the required insertion point, and then use the “paste” function (retaining source format) to paste the hymn words into the PPT.
Continue to build up the full PPT using the steps described above.
¶ Adding the “Intimations” movies.
The beginning and end “Intimations” files are made up from another PowerPoint Presentation titled DDMMYYYY_Intimations, kept in the Weekly Clips folder.
These change from week to week, the information being culled from whatever source required, but mostly from the weekly “Newsy Mail” (as at June 2025). This is a bespoke file and it is not considered feasible to write an instruction for it! It has to be updated on a weekly basis, as for the Service Powerpoint. Upon completion, it should be saved as both a PPT presentation, AND as a video (MP4).
PowerPoint has an option to Export a presentation, as shown. 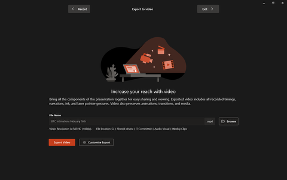 Get to this via the main PPT menu and select “record / export to video”.
Follow the options to generate an MP4 video of the same file name as the Intimations PPT in the same (weekly clips) folder.
Now go back to your Service PPT file, and use the Insert / Video / from this device menu options to insert the video into the first and the last slides. You may have to drag the insert out to the slide display edges. 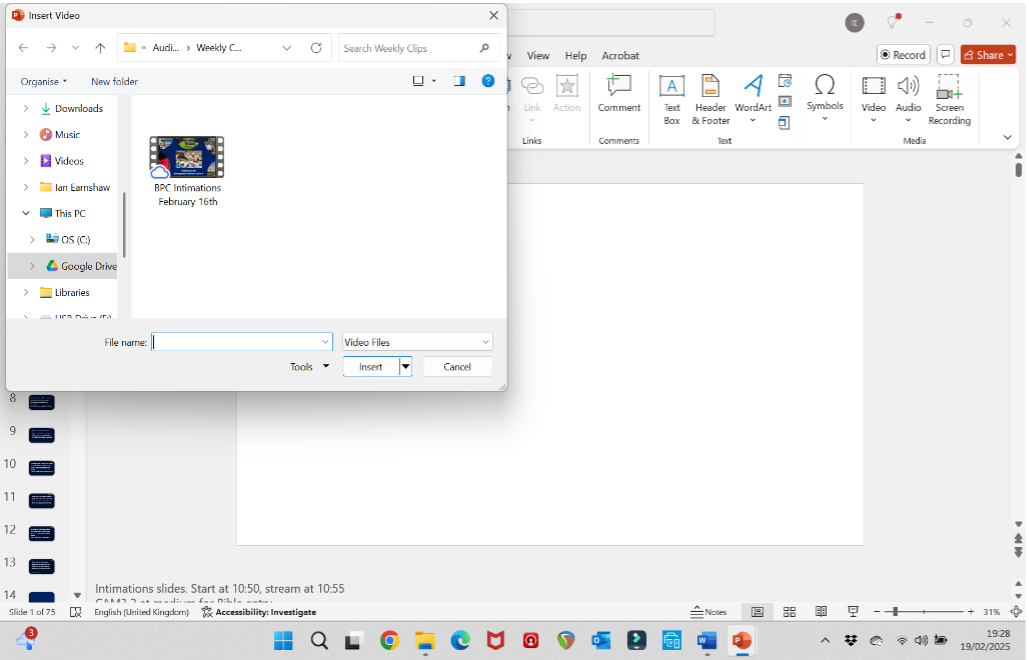
Once inserted, for the first slide, select the “Playback” menu option, and select “loop until stopped” tick box.
¶ Saving and approving the files.
Make sure both files have been saved correctly to the Weekly Clips folder – the service will be run from these files!
FOR EACH FILE – open the file and do a “Print/Print to PDF” as shown below.
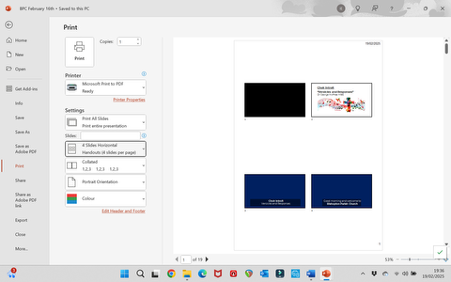
The files should be saved to the Weekly Clips folder under the same names as the PowerPoint files themselves, and should then be forwarded to the relevant persons (Minister/Service Leader, Organist, Church Officer, AV Duty Team and others as appropriate) for review and feedback.
¶ Transitions
In the Intimations file (especially) and also in the main file, it is important to check that the slide transitions have been set up correctly.
For the Intimations file, go to the “Transitions” tab and check that transitions have been set up. You can choose to vary the transitions if you prefer – currently we use a “morph” over 1 second, but it is essential that you set the slide to advance automatically (“Advance Slide – “after” say 10 seconds). Once you have done this and saved the file, run a slide show and check that all slides advance as set up.
For the main file, check that the Advance Slide is set ONLY to “on mouse click”. IN BOTH CASES ensure that you have used the “Apply To All” button to make sure that all slides behave in the same manner.
FINALLY – make sure that all modified files have been uploaded completely to the Google Drive before shutting down – failure to do so will lead to nasty surprises!
¶ Adding video operator instructions to the Service Powerpoint.
The Service Powerpoint can have video operator instructions added to each slide. Only do this if you are confident about how the sound desk and video mixer desk work!
On each slide (opened in normal view), “Notes” can be added at the bottom of the page. These should be used to guide the sound desk and camera operators about what is expected to happen before, during, and after the slide is to be displayed.
This can include general instructions (e.g. regarding what sound channels are needed and doing sound checks before the start of the Service; what the next camera shot should be once the current slide is closed; any other advice that may be useful!), plus more specific instructions e.g. suggesting that a slide should be displayed briefly and at which point in the service.
The person adding the notes should run through the Service PowerPoint, trying to envisage what will be the best way of running the Service. There’s no right or wrong, and alternative choices will (almost inevitably) need to be taken on the day!
The instructions will appear when the PowerPoint is put into “Slide Show” mode as comments adjacent to the current slide.